As the evening twilight drapes a cozy glow over the kitchen, the thought of crafting homemade cannoli shells brings a smile to my face. There’s a certain charm in creating your own treats from scratch, where the vibrant essence of Italy dances in every crispy bite. The moment that flour meets butter and sugar, you can already sense the promise of a delightful treat ahead.
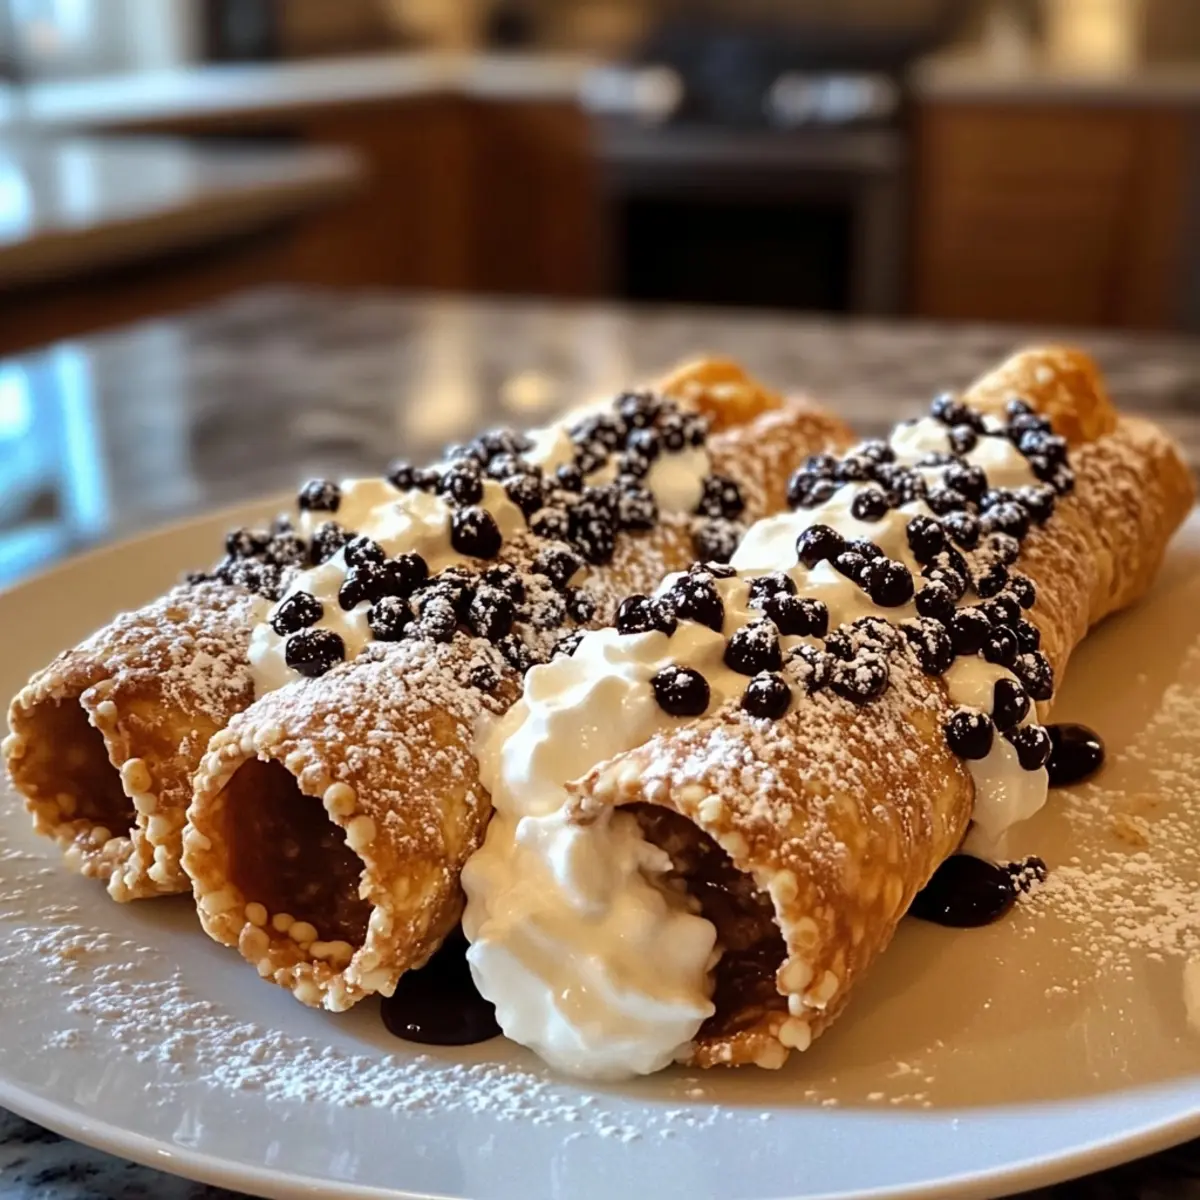
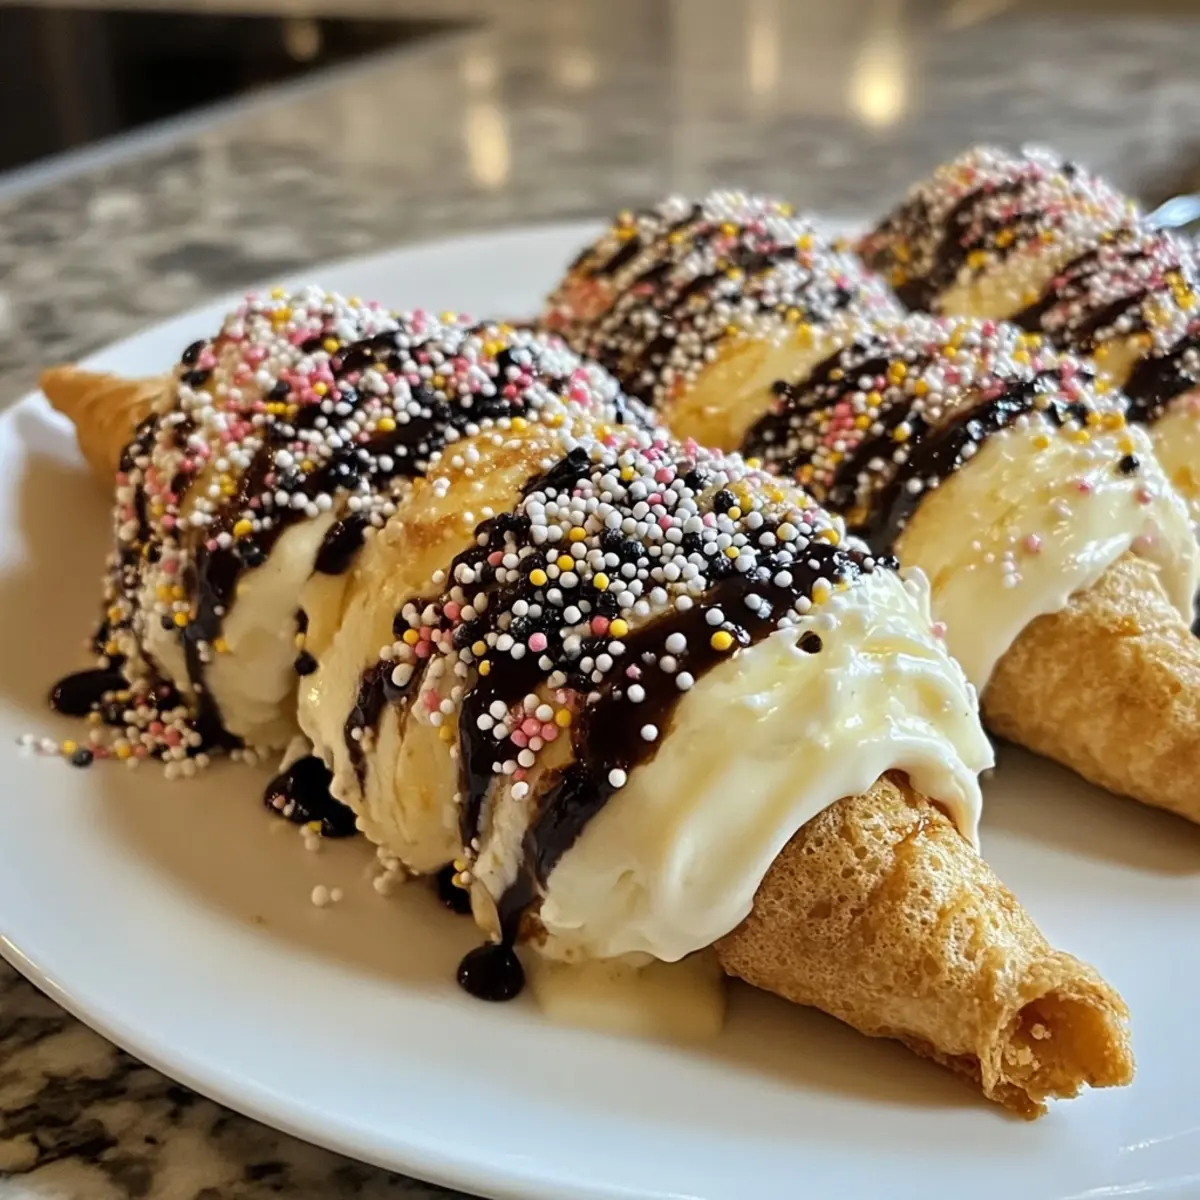
Imagine the satisfying crunch of these golden-brown pastry tubes, perfectly crisped and ready to cradle a rich, velvety filling. Unlike the lackluster store-bought versions, these cannoli shells sing with flavor and texture, providing an inviting canvas for your favorite fillings—whether it’s a classic sweetened ricotta or a whimsical chocolate mascarpone.
This delightful recipe not only elevates your dessert game but also serves as a heartfelt way to connect with loved ones, making every gathering a little sweeter. So roll up your sleeves and let’s bring a taste of la dolce vita into your home with these irresistibly crispy homemade cannoli shells!

Why are Cannoli Shells a Must-Try?
Crispy, these homemade cannoli shells deliver that delightful crunch that elevates any dessert experience. Unique flavor infuses each bite, thanks to fresh ingredients—far superior to store-bought! Easy to make, the straightforward process ensures everyone from beginners to seasoned chefs can create these Italian delights. Customizable fillings mean you can create a treat tailored to your tastes, whether creamy ricotta or sumptuous chocolate. Perfect for gatherings, they are sure to impress your friends and family at any occasion!
Cannoli Shells Ingredients
For the Dough
• All-purpose flour – Provides structure for the shells; gluten-free flour blends can be tested as a substitute.
• Light brown sugar – Adds subtle sweetness and color; granulated sugar can provide a lighter flavor.
• Salt – Enhances the flavor of the dough; no substitutions needed.
• Unsalted butter (cold & cubed) – Creates a flaky texture when integrated into the flour; vegan butter can be used for a dairy-free option.
• Large eggs (beaten, divided) – Binds ingredients and seals the dough; necessary for the best texture.
• Marsala wine (or dry white wine) – Contributes flavor and assists in dough formation; vinegar mixed with water can be a substitute.
For Frying
• Vegetable oil – Used for frying the shells; feel free to use your favorite frying oil.
Bring the delightful experience of cannoli shells into your kitchen with these carefully selected ingredients!
How to Make Cannoli Shells
- Prepare Dough: In a mixing bowl, combine all-purpose flour, light brown sugar, and salt. Incorporate the cold, cubed butter until the mixture resembles coarse crumbs—a key step for that flaky texture!
- Combine Wet Ingredients: Pour in the Marsala wine and one beaten egg. Stir until a cohesive dough forms, embracing the magic of your ingredients coming together.
- Chill: Shape the dough into a disc, wrap it in plastic wrap, and refrigerate for at least one hour. This step helps the dough relax, making it easier to work with later.
- Roll Out Dough: On a floured surface, roll out a portion of the chilled dough to about 1/4-inch thickness. Keep an eye out for an even thickness, which is crucial for frying.
- Cut and Shape: Use a 4-inch round cutter to cut out circles from the dough. Wrap each circle around a cannoli tube and seal with a little egg wash for a perfect stick.
- Heat Oil: In a large pot, heat vegetable oil to 365°F. A precise temperature is vital to ensure that the shells fry up crispy and golden.
- Fry Shells: Carefully fry the molds in the hot oil for about 3 minutes, turning them as needed for even browning. Once golden, remove them and let them cool on paper towels.
- Remove Molds: Once cooled for a moment, gently twist and remove the molds from the shells. They should come away easily, leaving you with beautiful tubular pastries!
- Cool Completely: Allow the shells to cool fully before filling them with your favorite creamy delights, ensuring the perfect texture for every bite.
Optional: Dust with powdered sugar for an elegant touch before serving.
Exact quantities are listed in the recipe card below.
What to Serve with Homemade Crispy Italian Cannoli Shells?
Pairing these delightful cannoli shells with complementary flavors can create a truly unforgettable dessert experience.
- Sweetened Ricotta Filling: A classic option, rich and creamy, it perfectly balances the crunchy texture of the shells.
- Chocolate Ganache: This decadent filling offers a luscious, indulgent counterpoint to the crispy shells. Drizzle extra ganache on top for a delightful presentation.
- Fresh Berries: The tartness of strawberries or raspberries adds a refreshing contrast, brightening up each bite.
- Powdered Sugar Dusting: A simple yet elegant touch that enhances the visual appeal and sweetness of the cannoli, completing your dessert masterpiece.
- Citrus Zest: A sprinkling of orange or lemon zest can brighten the flavors, lending a zingy twist that pairs beautifully with the creaminess.
- Espresso or Coffee: Serve alongside a warm mug of espresso for a classic Italian finish that enhances the dessert’s richness.
Indulging in a combination of these choices allows you to customize your cannoli shells to fit your preferences while creating a sweet experience that lingers long after the last bite.
How to Store and Freeze Cannoli Shells
- Room Temperature: Store unfilled cannoli shells in an airtight container at room temperature for up to 1 week to retain their crispness. Avoid exposure to humidity.
- Fridge: If you have leftover filled cannoli, keep them in the refrigerator for up to 2 days, covered lightly to prevent sogginess.
- Freezer: For long-term storage, unfilled shells can be frozen in a single layer, then placed in a freezer bag for up to 2 months. Allow them to thaw at room temperature before serving.
- Reheating: To revive the crispness of previously frozen shells, pop them in a preheated oven at 350°F for about 5-7 minutes. Enjoy fresh-tasting cannoli shells!
Cannoli Shells Variations & Substitutions
Your journey to homemade cannoli shells doesn’t have to end here; let your creativity bloom with these fun variations! Feel free to explore and personalize your cannoli adventure as you indulge in these delightful flavors and textures.
- Gluten-Free: Substitute all-purpose flour with a 1:1 gluten-free flour blend for a delicious alternative that everyone can enjoy.
- Dairy-Free: Use vegan butter in place of unsalted butter for a delightful dairy-free treat, ensuring that no one is left out of the fun.
- Wine-Free: Replace Marsala wine with a mixture of vinegar and water for a non-alcoholic twist while keeping that scrumptious flavor intact.
- Flavor Boost: Infuse the dough with a pinch of cinnamon or a dash of vanilla extract for added warmth and richness that elevates the entire experience.
- Mini Shells: Cut smaller circles to create bite-sized cannoli shells perfect for parties, allowing guests to enjoy a variety of fillings in just one bite.
- Sweet Twist: Incorporate cocoa powder into the dough for a chocolatey version, adding richness and depth that will make every bite unforgettable.
- Nutty Flavor: Roll the fried shells in finely chopped pistachios or almonds while warm for a nutty crunch that complements the sweet filling beautifully.
- Spicy Kick: Drizzle a bit of spicy honey on filled cannoli for an unexpected kick, turning your classic dessert into a fun, adventurous treat that surprises the taste buds.
Expert Tips for Cannoli Shells
- Dough Consistency: Make sure the dough is not too sticky; this will help you roll and shape it easily. If it’s too dry, add a teaspoon of cold water.
- Chill Time Matters: Chilling the dough for at least an hour not only makes it easier to roll but also enhances the texture of the cannoli shells.
- Frying Temperature: Keep an eye on the oil’s temperature. If it’s too hot, the shells can burn quickly; too cool, and they’ll absorb excess oil.
- Gentle Handling: Handle the fried shells with care as they are delicate. Always let them cool before trying to remove the molds.
- Make Extras: It’s a good idea to make a few extra cannoli shells as they may break during frying. This way, you’ll have plenty for filling!
Cannoli Shells Recipe FAQs
How can I tell if the ingredients are fresh enough to use?
Absolutely! For optimal results, use fresh ingredients. Check that your all-purpose flour is free from lumps and has no off smell. The eggs should be fresh, with a clean shell. If you’re using wine, ensure it has not gone bad—if it smells vinegary or flat, it’s time to toss it.
What’s the best way to store leftover cannoli shells?
To maintain that delightful crunch, store unfilled cannoli shells in an airtight container at room temperature for up to 1 week. Avoid letting them sit in humid environments, as moisture can make them soft. If filled, refrigerate them for up to 2 days, but be aware that the shells will gradually soften.
Can I freeze the cannoli shells?
Very! Unfilled cannoli shells can be frozen for up to 2 months. First, let them cool completely, then arrange them in a single layer on a baking sheet to freeze. Once solid, transfer them to a freezer bag or airtight container. When you’re ready to enjoy, simply thaw them at room temperature, and if you want them crispy again, pop them in a preheated oven at 350°F for about 5-7 minutes.
What should I do if my cannoli shells break while frying?
Don’t worry, it happens to the best of us! To troubleshoot, ensure your oil is at the right temperature—around 365°F. If at any point the shells feel too delicate, consider making a few extra shells while you fry. You can also try rolling the dough slightly thicker to provide more stability. Remember, you can also celebrate the broken pieces as tasty chef’s treats!
Are there any dietary considerations to keep in mind?
Absolutely! For those who are gluten-sensitive, you can experiment with a gluten-free flour blend, but be aware that results may vary. If you’re seeking dairy-free options, swap the unsalted butter for vegan butter, and make sure any fillings you choose are dairy-free as well. Always check labels for potential allergens if serving to guests with food sensitivities.

Irresistibly Crunchy Cannoli Shells Made Right at Home
Ingredients
Equipment
Method
- In a mixing bowl, combine all-purpose flour, light brown sugar, and salt. Incorporate the cold, cubed butter until the mixture resembles coarse crumbs.
- Pour in the Marsala wine and one beaten egg. Stir until a cohesive dough forms.
- Shape the dough into a disc, wrap it in plastic wrap, and refrigerate for at least one hour.
- On a floured surface, roll out a portion of the chilled dough to about 1/4-inch thickness.
- Use a 4-inch round cutter to cut out circles from the dough. Wrap each circle around a cannoli tube and seal with a little egg wash.
- In a large pot, heat vegetable oil to 365°F.
- Carefully fry the molds in the hot oil for about 3 minutes, turning them as needed for even browning.
- Once golden, remove them and let them cool on paper towels.
- Once cooled for a moment, gently twist and remove the molds from the shells.
- Allow the shells to cool fully before filling them with your favorite creamy delights.
- Optional: Dust with powdered sugar for an elegant touch before serving.
Nutrition
Notes
Tried this recipe?
Let us know how it was!
Leave a Comment